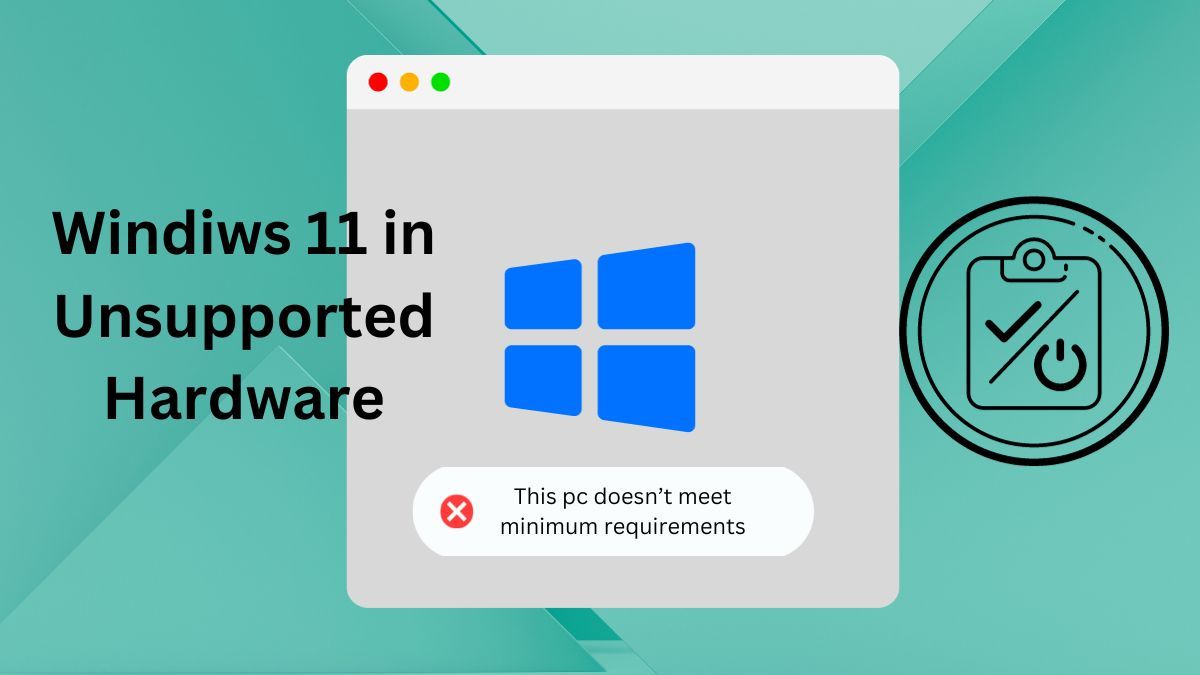
Hello friends, welcome to inet70. In this topic, we will discuss how to install the Windows operating system on unsupported hardware. First, we will cover the actual reasons for the Windows 11 booting error. This error occurs when we try to install the latest Windows 11 on an old computer or laptop that is not compatible with the hardware requirements. The error message states that the PC does not meet the minimum system requirements, such as TPM, Secure Boot, and a compatible CPU.
Now, let's discuss the requirements for this project. You will need a laptop or computer with at least 4GB of RAM and 80GB of free storage. Additionally, you will need a bootable Windows 11 pendrive.
If you have all the required objects, you can start the process with me. Here are the steps to install Windows 11 on unsupported hardware.
- Boot your computer with the Windows pendrive.
- Select the language and proceed with the installation steps.
- After following all the easy steps, you will reach a point where you need to select the Windows version. Choose the desired version and click on "Next".
- At this point, you may encounter an error message stating that your PC does not meet the minimum system requirements. To resolve this, press "Shift + F10" to open the Command Prompt.
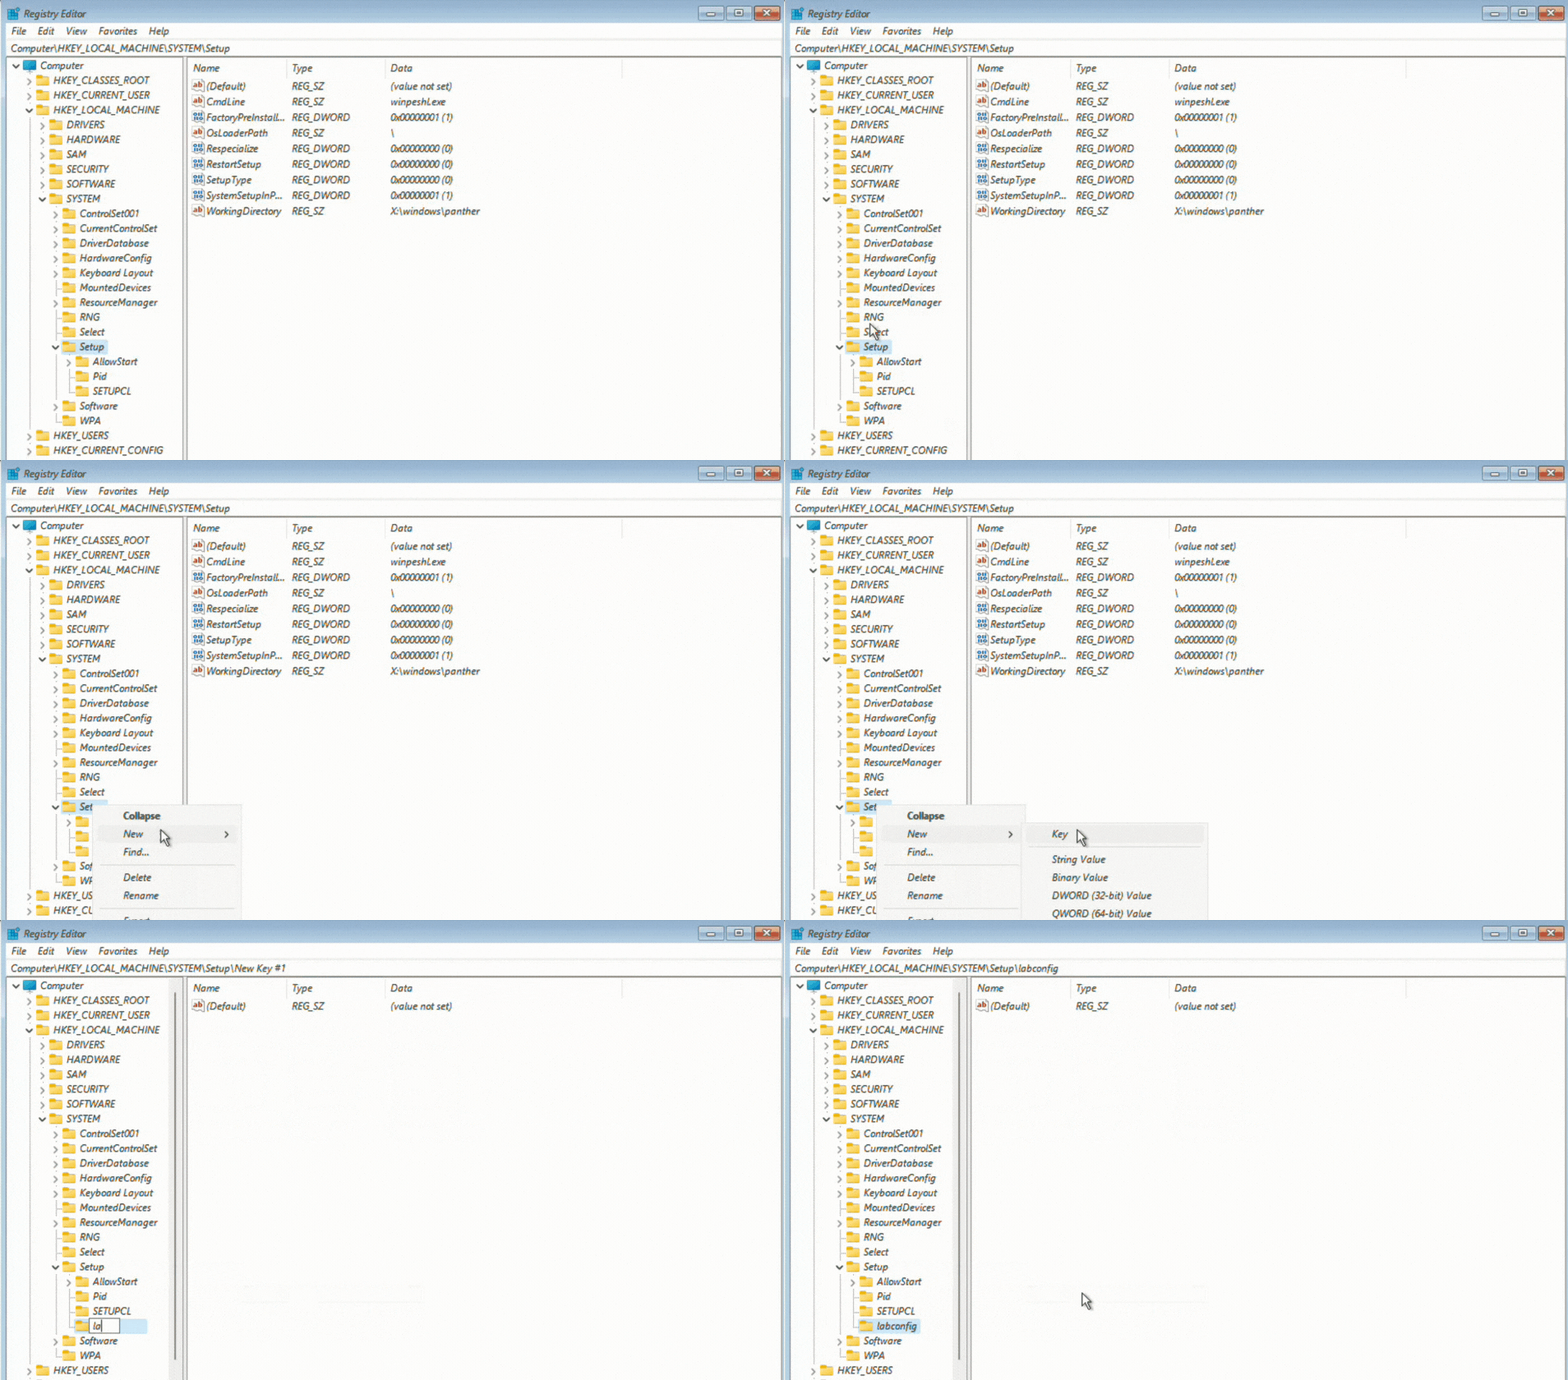
- In the Command Prompt, type "regedit" and hit Enter to open the Registry Editor.
- Navigate to "HKEY_LOCAL_MACHINE\SYSTEM\Setup" in the Registry Editor.
- Right-click on the "Setup" folder, select "New", and then choose "Key" to create a new subdirectory. Name this directory "Labconfig"

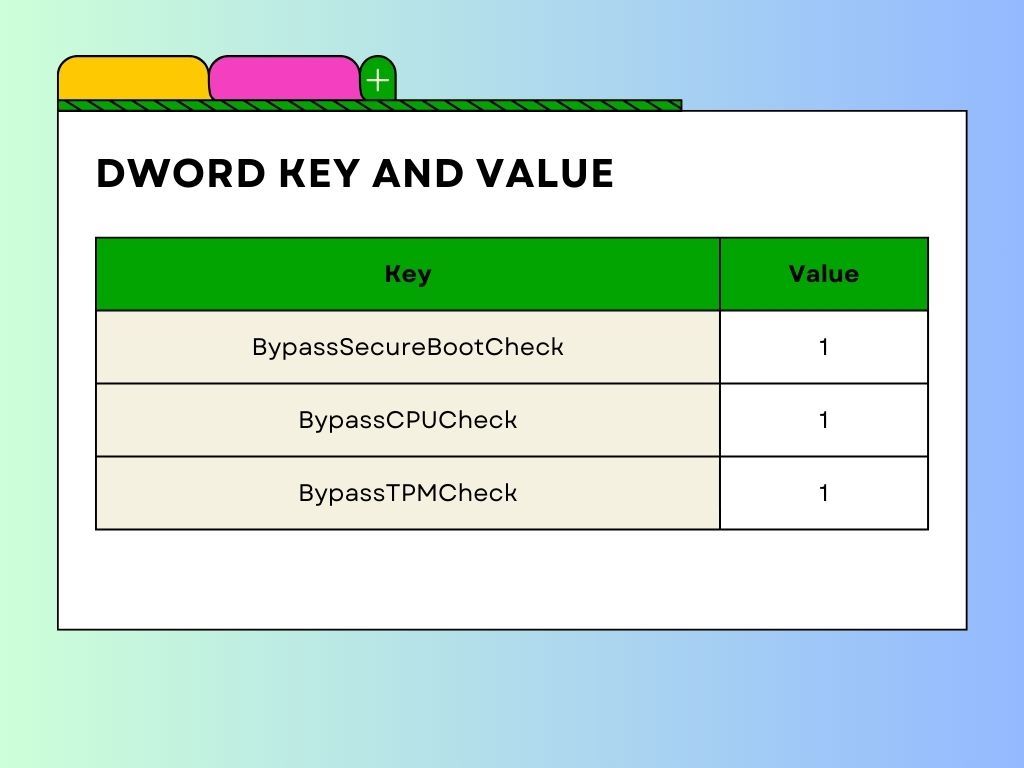
- After completing the above step, we need to add three new important DWORD (32-bit) Value keys in this location:

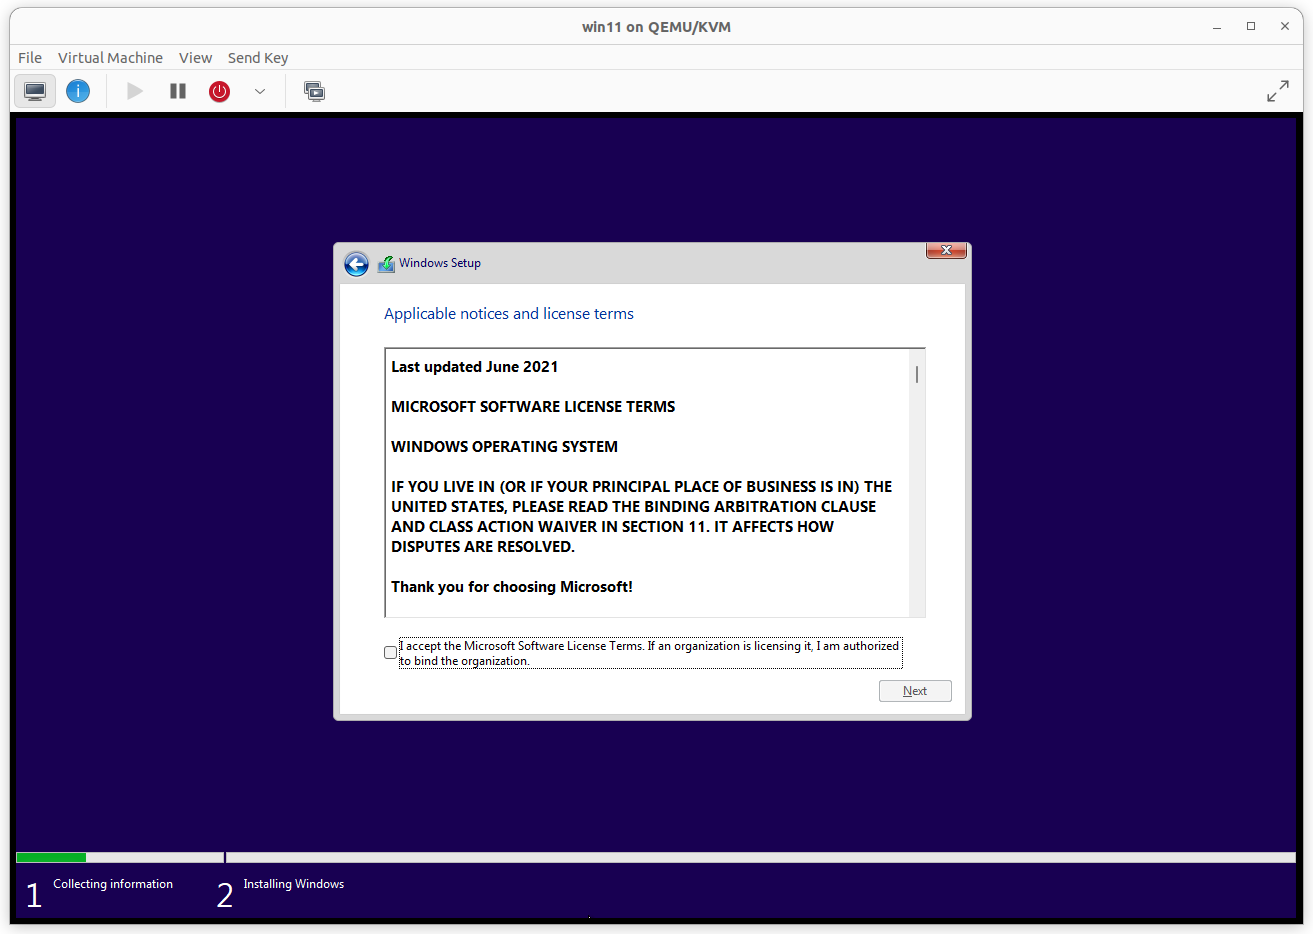
On the left-hand top side of the installation panel, you will find a "Back" option. Click on it and select "Windows User" to proceed. Then, click on "Next" to continue and redirect to the Windows Terms page.

You can find more detailed information in the provided video. Once you have completed all the steps, close the Registry Editor and Command Prompt windows, and return to the installation panel.
- Complete this step and you can now install Windows 11 and start using it.
Please note that these steps are provided for informational purposes only. Make sure to follow any official guidelines or instructions from Microsoft for a successful installation.


