FTP for Ubuntu Server: Make File Transfer is Easy

In general, most people use Bluetooth, WiFi, or Hotspot for sharing files to other devices. However, it's not always possible in all systems. If you need to share files to a computer without using a Bluetooth device, one solution is to share files over the Internet. But what can you do when there is no grid available, and the current system runs as a server? In these cases, we need to share files over FTP. Today's topic is about using FTP for an Ubuntu Server.
Before starting this process, I need a couple of minutes of your time to understand FTP.
What is FTP?
FTP is a powerful protocol for sharing any media or files to any device. It's known as File Transfer Protocol. It can work over ports 20 and 21. This is used for web hosting, transferring data, and migrating any project to another device. It works for Linux, Windows, Mac OS, and other operating systems to share files without any third-party Bluetooth or WiFi device. It's mostly used for hosting servers and web applications hosted on machines. In these cases, the production server is not able to access via wired, Bluetooth, and WiFi devices. It's only available through an Internet connection, then you can share media or files over the FTP client with using the port and public IP address.
In my case, I use the Ubuntu operating system for FTP access. Now follow the given steps to install an FTP server on Ubuntu server.
Install FTP for Ubuntu
To install the FTP server, first, ensure your Ubuntu is still connected to the Internet and has a public IPV4 address for remote access. If you have these details, open the terminal and update and upgrade all Ubuntu packages.
$ sudo apt update && sudo apt upgrade -y
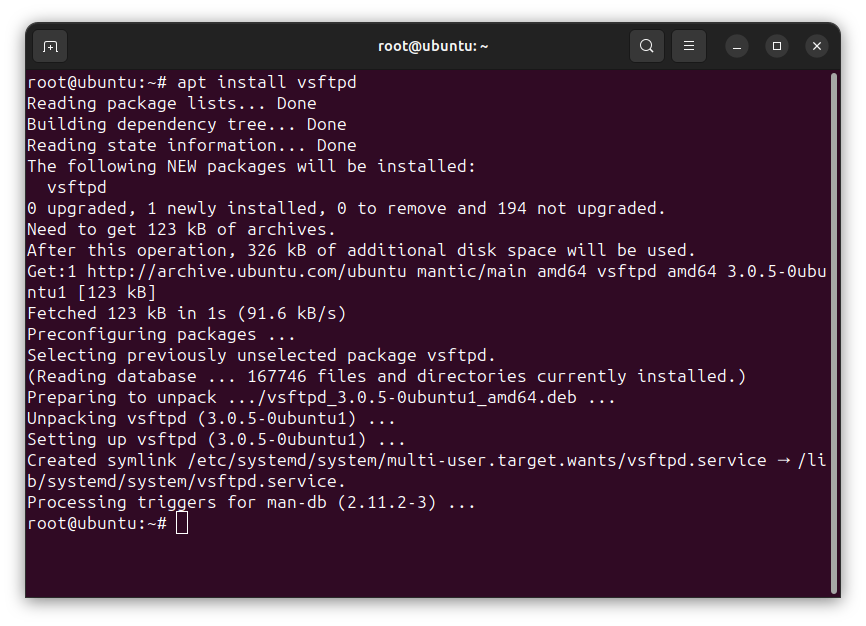
After updating and upgrading packages, your Ubuntu system is refreshed. To enable the FTP server, we need to install vsftpd for public sharing files. Put the following command:
$ sudo apt install vsftpd -y
After installing vsftpd FTP server, input the following commands to start the FTP server:
$ systemctl start vsftpd
$ systemctl enable vsftpd
After this step, you need to verify this service is working currently by following command:
$ sudo systemctl status vsftpd
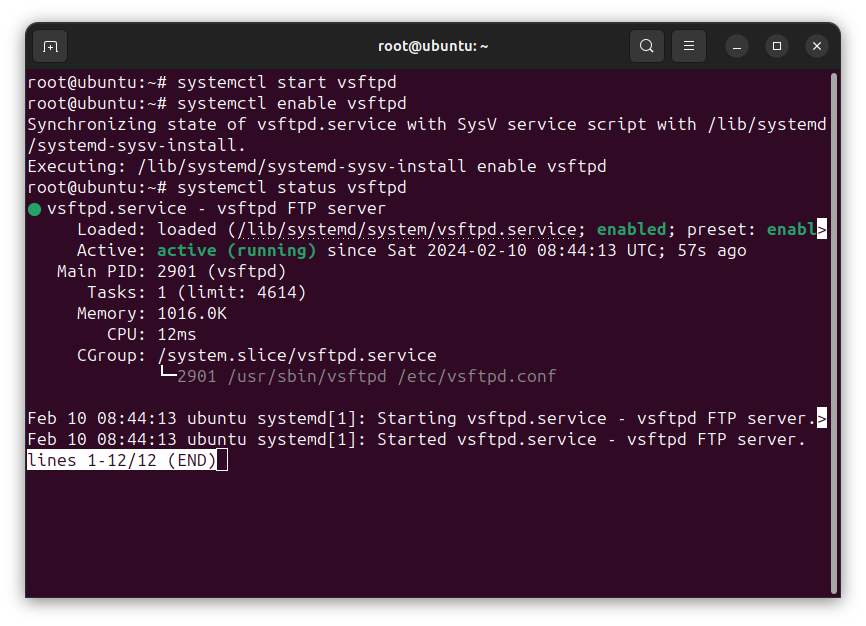
After inputting this command, if you can see the service is running, then your FTP server is ready to use. If it shows inactive, then you need to follow all the steps again after rebooting the Ubuntu system. If you are done, then follow the next command to allow the firewall rule for the FTP server:
$ sudo ufw allow 20/tcp
$ sudo ufw allow 21/tcp
Now, test the given FTP server from another device.
Access FTP Server
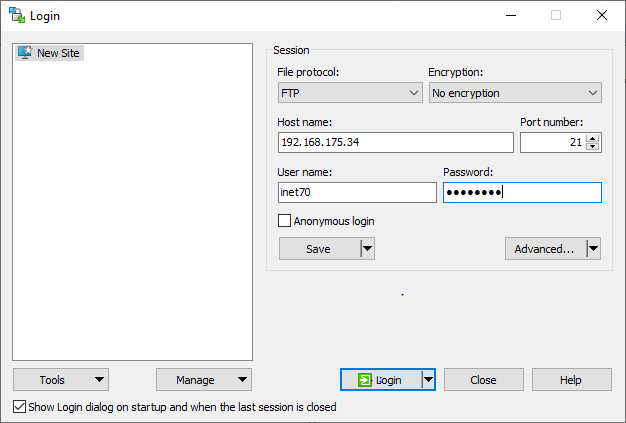
For accessing the FTP server, we need FTP client software. In Mac, Linux, and Windows operating systems, you can install Filezilla software. This software is free and available for any device. After installing, go back to your FTP server's terminal and input ip a to show your public IPV4 address.
Just remember your public IPV4 address and go back to your FTP software. Inside the host section, input the public IPV4 address and input username and password to login.
Now, the FTP server is ready to use. You are able to transfer files from the server to the client and vice versa over the Internet. If you have transferred the required file, you can stop the FTP server's remote access by the given step.
Stop FTP Server
This is a crucial security step. To secure the website data, you need to turn off the FTP server. Input the given command in the Ubuntu server to stop the FTP server.
$ sudo systemctl stop vsftpd
After inputting this, the FTP service is stopped. Then, you are not able to access the FTP server from the FTP client. To enable the FTP service, you can use the previous step.
Comments ()