Install owncloud on Ubuntu 22.04 server

Hello friends, welcome to the inet70 blog. Today I can guide you how to install ownCloud on Ubuntu 22.04. Before installing this server, get some basic information about ownCloud server.
Need the Ubuntu 22.04 SSH server with root access. One domain for use as a web server. Now follow all my steps for installing the server. Now we can get some information about owncloud.
What is owncloud?
owncloud is an open source Linux tool for storing and managing the media files and data files on a server remotely. This server is similar to the nextcloud server. Access all media and upload the media on owncloud server. We can easily install the extensions on owncloud server for access and manage all data on the server. owncloud is totally free to use in your system. Now we can test this by the following way.
How to install owncloud on Ubuntu 22.04?
First connect your Ubuntu system with an SSH Client. We need to first update and upgrade all Ubuntu packages.
sudo apt update && sudo apt upgrade -ycomplete the update and upgrading process.
Install Apache
Apache is a web server. It is compulsory to access the owncloud on Ubuntu 22.04 from a web browser.
sudo apt install apache2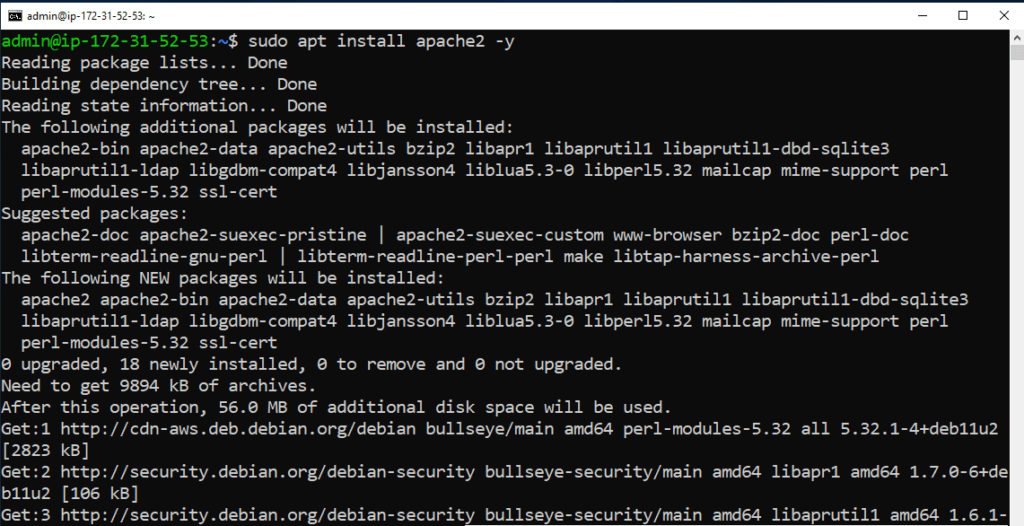
Put the following command into the server installation process. Asking for the “continue the process?” You can press y and start the installation process. Now put the following commands to start the Apache server.
sudo systemctl start apache2
sudo systemctl enable apache2
Now we can check the apache server by following command:
sudo systemctl status apache2
Here you can show your apache server is Active (Running) then press the q to exit from the apache server status in terminal.
Now we can install MYSQL on the Ubuntu server.
Install MYSQL
MYSQL is important in owncloud server for storing and managing the data of the server. Now put the following command to start the installation process.
sudo apt install mariadb-server mariadb-client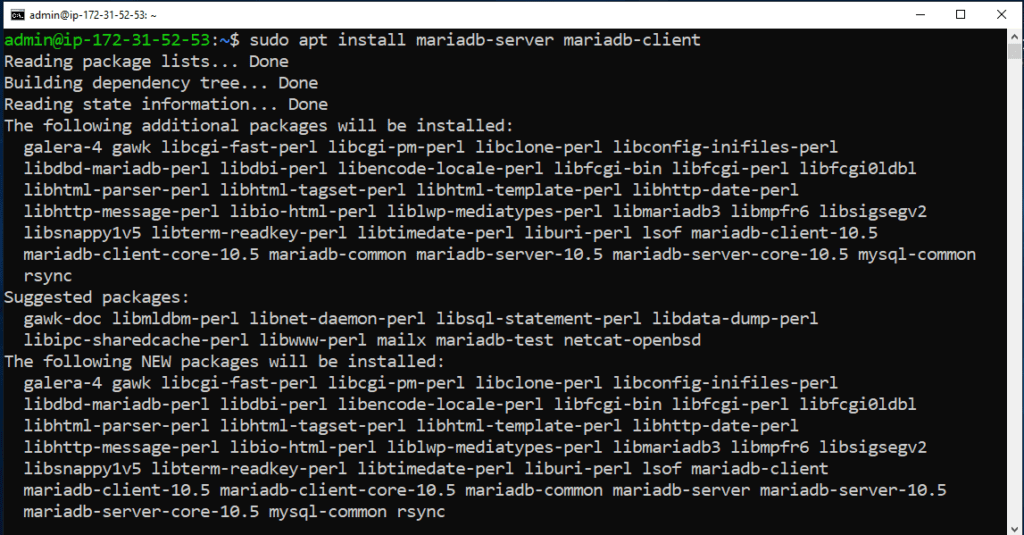
Start the installation process. You can get the asking for “continue installation process?” Press the y and start installation.
Install php components
We need a php server to manage user data. You can put the following command to start the installation process.
sudo apt install php libapache2-mod-php php-curl php-intl php-json php-gd php-mbstring php-mysql php-xml php-zip -y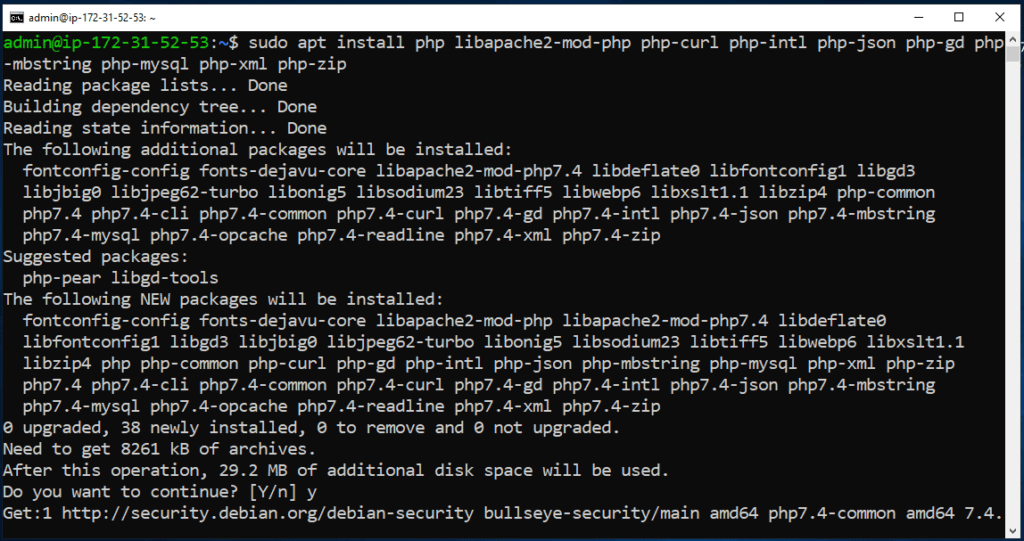
Start the all php components installation process
Configure MYSQL Database
Now configure the MYSQL database on Ubuntu server. First we can use the root user from the local user.
sudo suNow start MYSQL secure installation process with following command:
mysql_secure_installation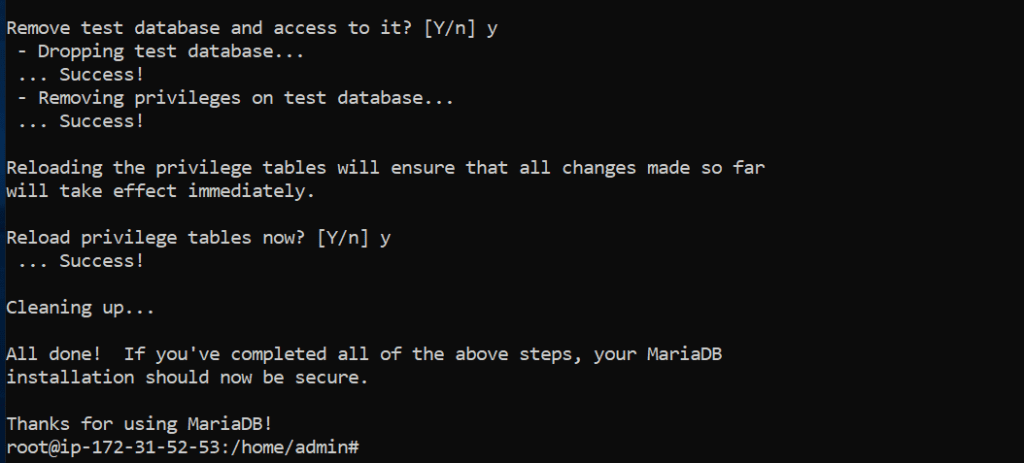
Press -y to Remove the anonymous user.
Press -y to Disallow root login remotely.
Press -y to Remove test database.
Press -y to Reload privilege tables.
Create owncloud database
Now we can create the database for the MYSQL server to manage the user data. Now login into mysql server.
mysql -u root -p- CREATE DATABASE ownclouddb;
- GRANT ALL ON ownclouddb.* to
- ‘ownclouduser’@’localhost’ IDENTIFIED BY ‘ownCl0ud!!’;
- FLUSH PRIVILEGES;
- EXIT;
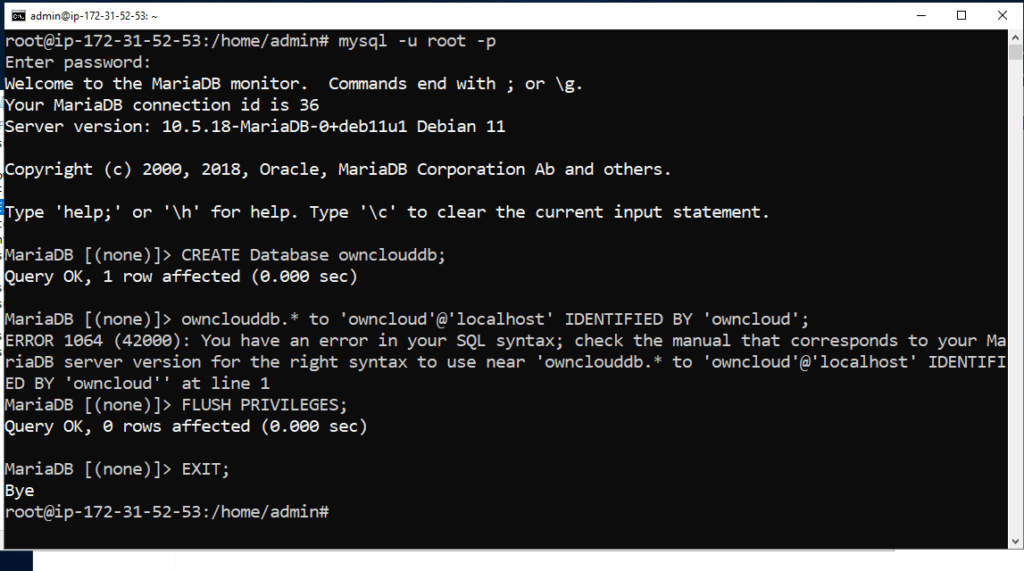
Put the all following commands in the database and create the new database for owncloud on Ubuntu 22.04 server.
Install owncloud on Ubuntu 22.04
Update all deb packages in the system
sudo apt updateNow install the nextcloud with following command:
cd /var/www/
wget https://download.owncloud.com/server/stable/owncloud-complete-latest.tar.bz2 && \tar -xjf owncloud-complete-latest.tar.bz2 && \
chown -R www-data. owncloud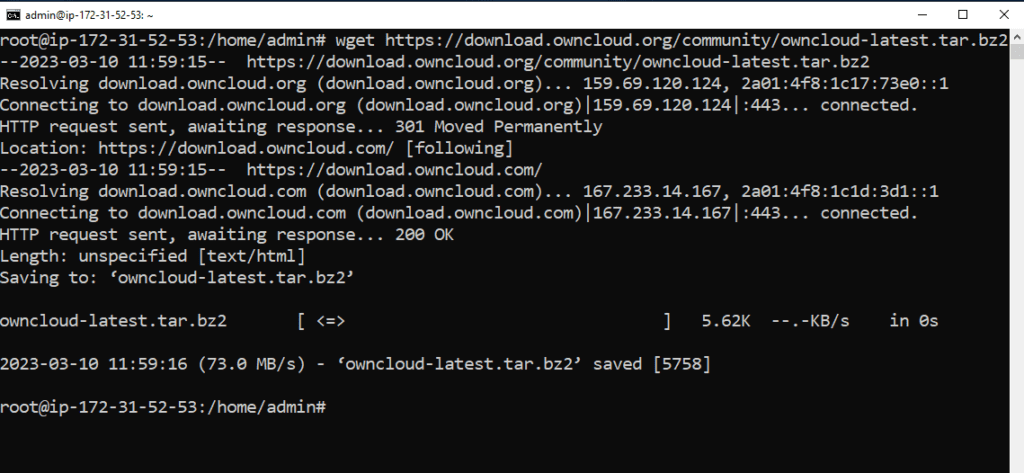
After completing this step, owncloud is successfully installed on our server. Now create the configuration files for owncloud on Ubuntu 22.04 apache server.
Create the owncloud.conf
This file is required to host our cloud server. First we can create the following file on our apache server. Put the following commands.
sudo nano /etc/apache2/sites-available/owncloud.confNow open the owncloud.conf file in the nano editor. You can copy and paste the given script in the configuration file.
Alias /owncloud "/var/www/owncloud/"
<Directory /var/www/owncloud/>
Options +FollowSymlinks
AllowOverride All

<IfModule mod_dav.c>
Dav off
</IfModule>

SetEnv HOME /var/www/owncloud
SetEnv HTTP_HOME /var/www/owncloud
</Directory>
Press ctrl+O and hit the enter key and ctrl+x and save the following configuration file.
Enable the owncloud site
Put the following commands to start onecloud.
sudo a2ensite owncloudsudo a2ensite rewrite headers env mime unique_id dav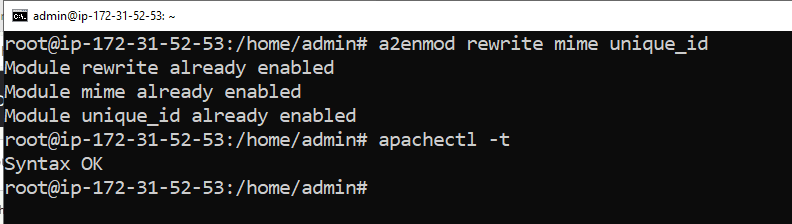
After completing this step now we can restart our apache server.
sudo systemctl restart apache2Now test owncloud server.
Open the browser and put the following line.
http://yourip/owncloud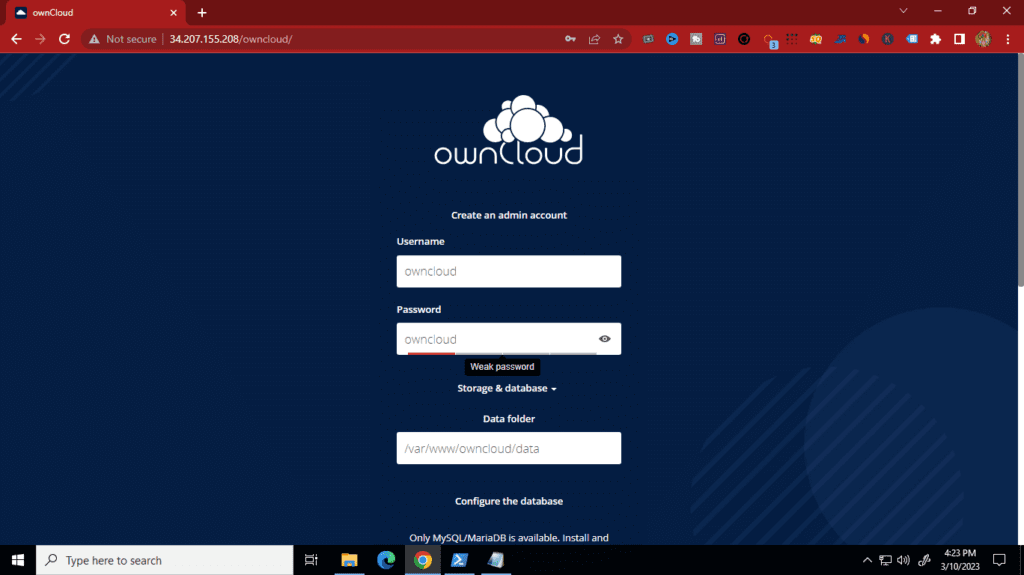
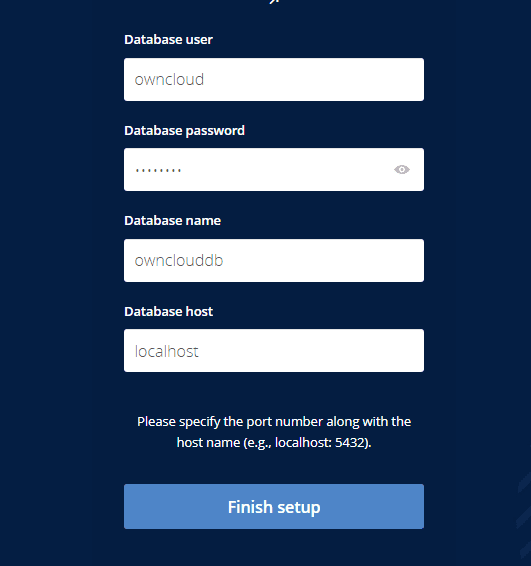
Put your Ubuntu server ip address at the yourip section. you can got the following dashboard in your browser.
username: ownclouduser
password: ownCl0ud!!
database name: ownclouddb
database host: localhost
Enjoy your server remotely and thank you for visiting our platform. Have a nice day.
Comments ()