
Ubuntu desktop also provides a great desktop experience. If you are newly upgraded or switched to Ubuntu desktop, then you can add custom resolutions for your desktop. It is a really great feature on Ubuntu and other Linux distros. If you use the Windows operating system, you cannot change resolution on Windows systems, but Linux is also great and open-source, so you can fully customize Linux distributions.
Change Resolution
For changing resolution on Ubuntu desktop, go to Settings and select the Display Settings. On this panel, you can see all available resolutions. If you're looking for a resolution that is not available, then you can follow this method to add a custom resolution.
Xrandr
Xrandr is a default enabled feature of Linux distributions. By using xrandr, you can make your own custom resolution with the terminal. For adding a custom resolution, follow these steps to start making a custom resolution. Open the terminal by pressing Ctrl + T on the desktop and input the xrandr command:
$ sudo xrandr
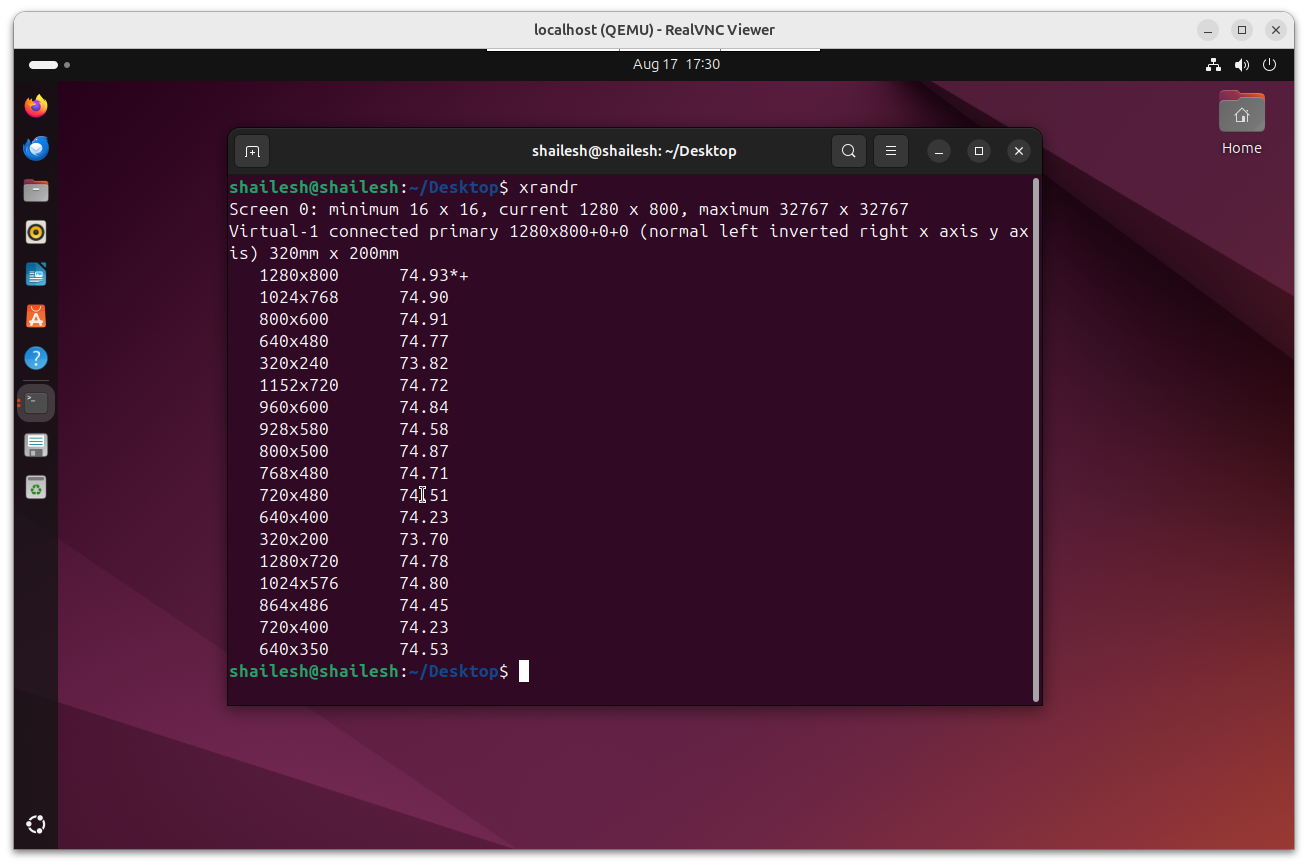
After inputting this command, in the output section, you can see all available xrandr resolutions we previously showed in settings. From this output, we need to save our Display ID. In my case, it's Virtual-1. My display ID is shown. All users may not show the same display ID. You can note down your Display ID, then input the next command:
$ cvt {hight} {Width}
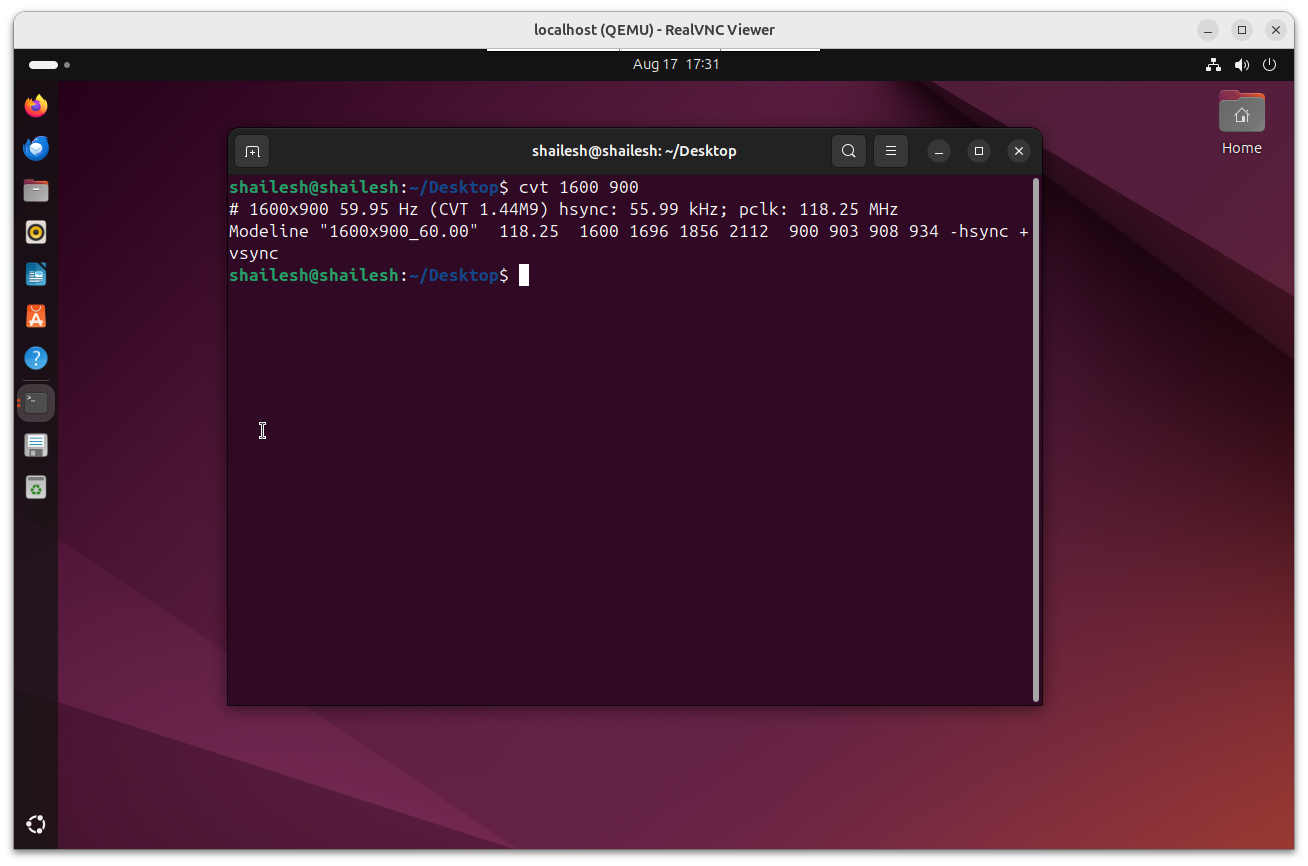
In this command, you need to input your custom screen resolution. In my case, I needed a screen resolution of 1600 x 900, so I input "cvt 1600 900". You will see the output.
We have successfully drafted a custom screen resolution's ratio. Now we need to add and make a new resolution by following this command:
$ xrandr --newmode "1600x900_60.00" 118.25 1600 1696 1856 2112 900 903 908 934 -hsync +vsync
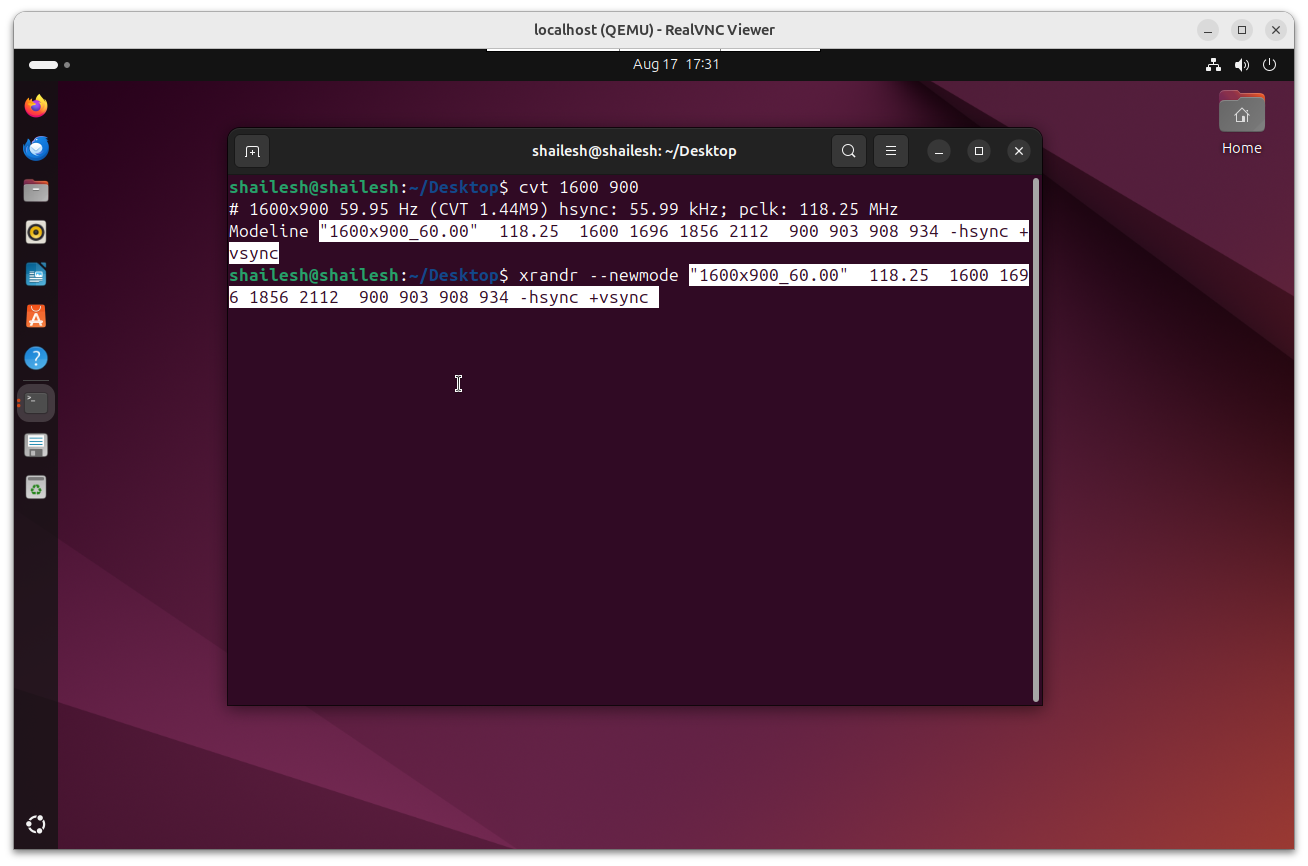
Put the highlighted code from the previous command into the new command section, then press the enter key. A new screen resolution is generated. Now we need to add this resolution to our Display Settings:
xrandr --addmode Virtual-1 "1600x900_60.00"
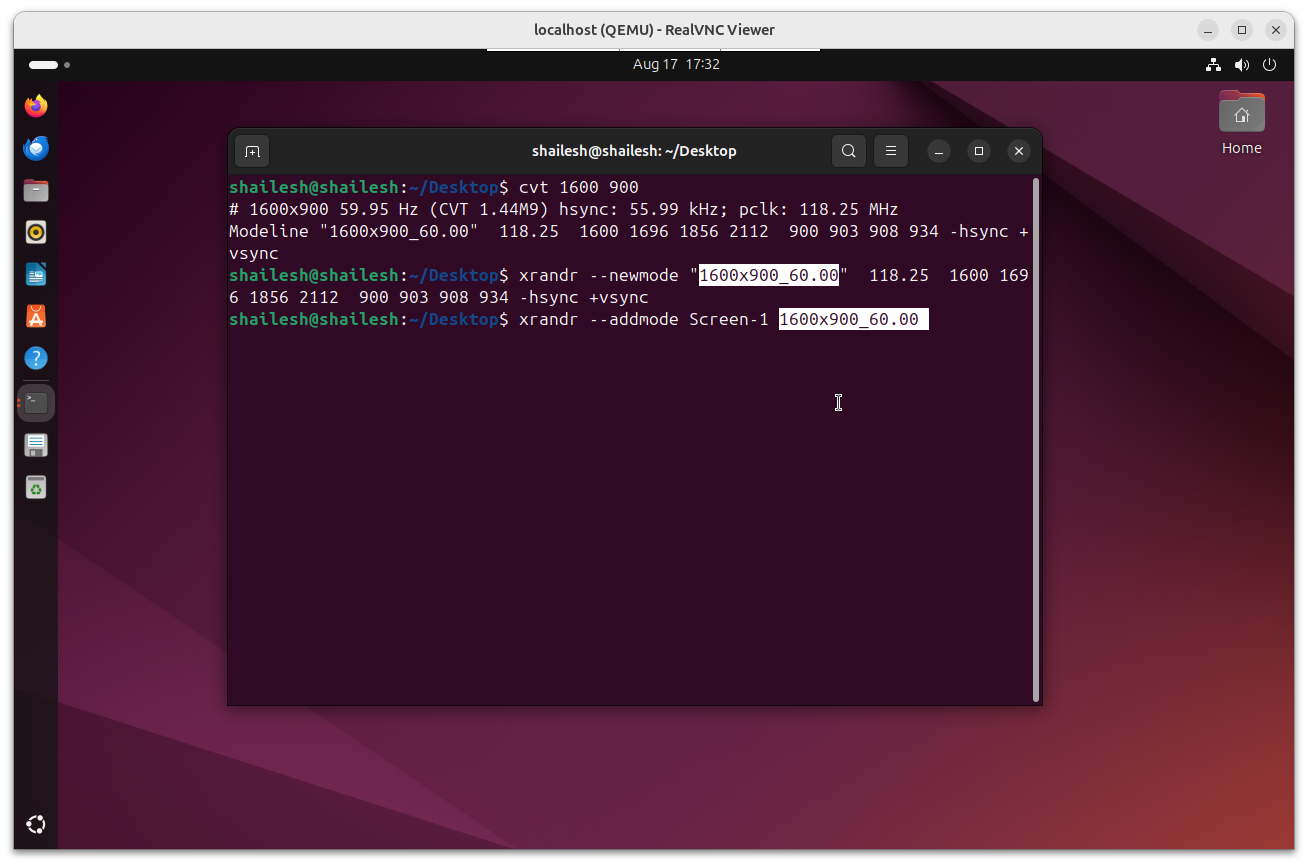
Input all information in the terminal with the given example to make a custom resolution. In this command, you can input your display ID and resolution size, then add the new resolution. Now go to Display Settings. Inside the Display Settings, you can see the newly added resolution and use this resolution as your desktop resolution.


